Scenario: Suppose there are some Action or service accounts which needs Local admin rights on the (bulk) machines.
Solution: 1) Either add those accounts to the machines one by one in every machines.
2) Do it with “Restricted groups” in group policy, Please check the attached file to do “step by step”.
The purpose of this document is to explain about “How to put a group of Active Directory users into the local Administrators group on the clients using Restricted Groups without giving Domain Admin permission”. In my example, the group is called “OpsMgrAdmins”. 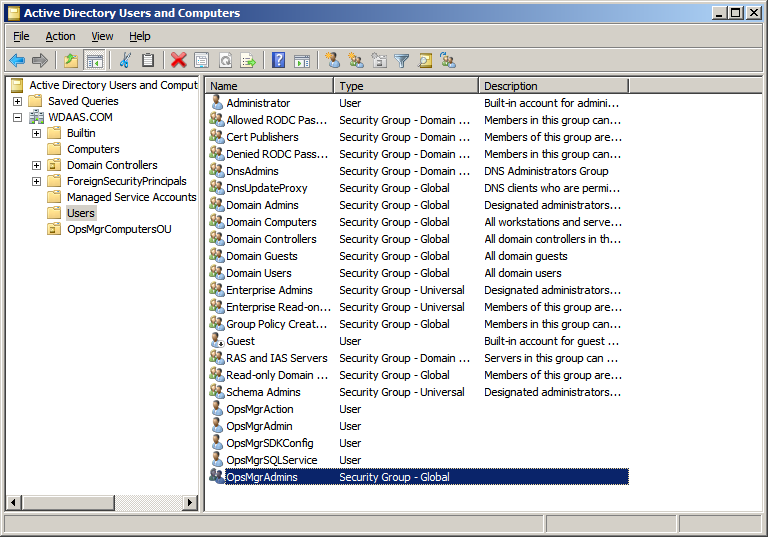
I have added the members into this group who need Local Admin privilege on (=target) machines.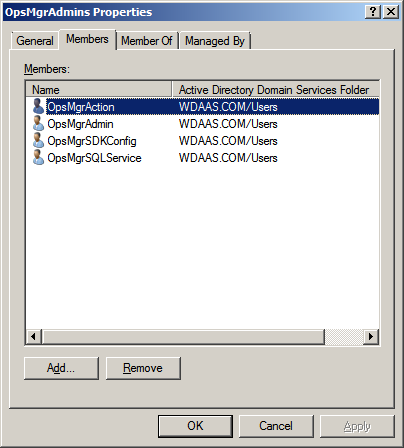
Now create an OU and move all the (=target) machines into that OU. In my example the OU is called “OpsMgrComputersOU”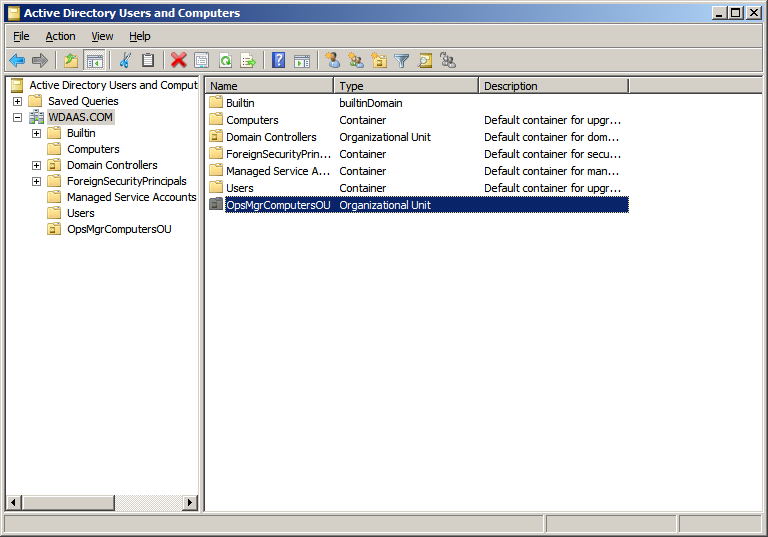
Now move the target machines into that OU.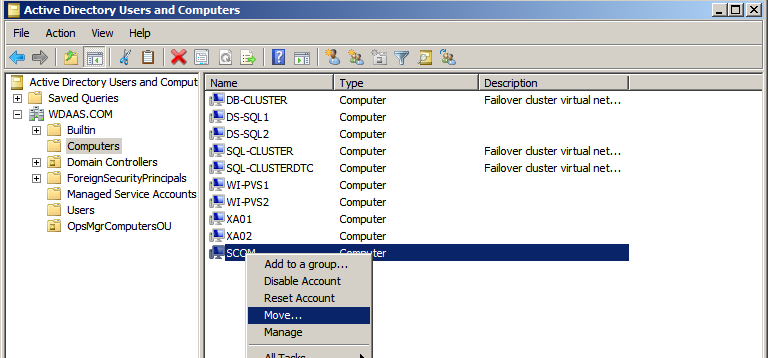
Select the OU and click OK.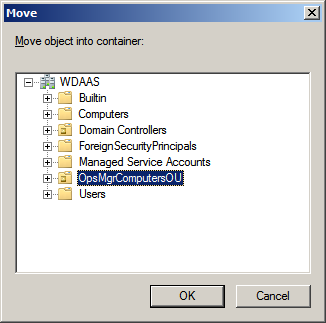
Can see the target machine into the OU.
Now open the Group policy management by using gpmc.msc command.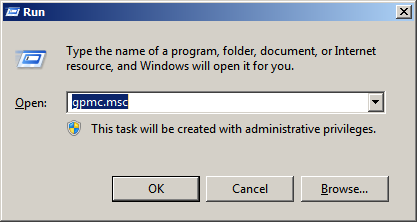
Right click on the OU and select Create a GPO in the domain, and Link it here.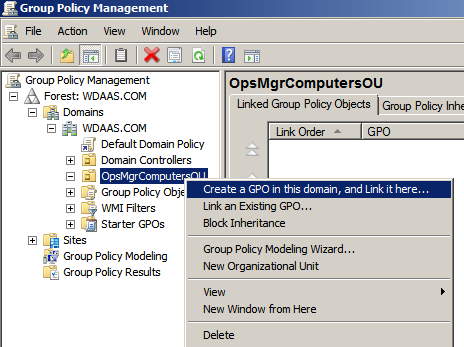
Name the GPO and click OK. In my example it is “ LocalAdminRights to OpsMgrAdmin Group”
Now right click on the newly created GPO and select Edit.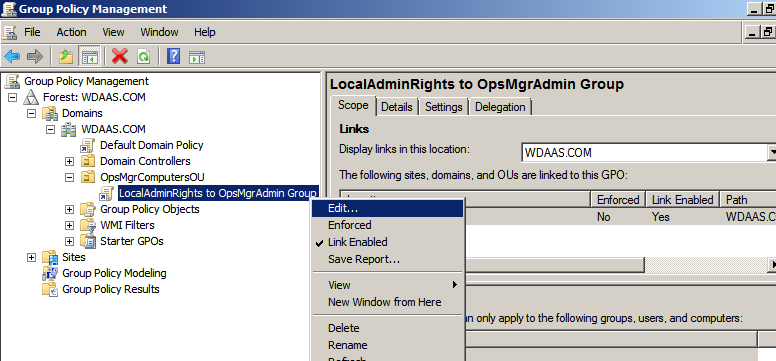
Now one more window will open. Select “Restricted Groups” and right click and Select Add Group.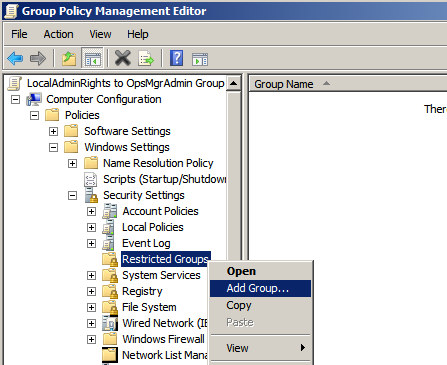
Specify the Group and click OK.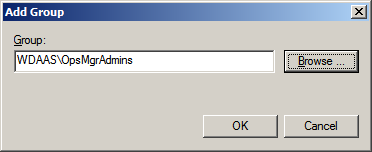
One more Beautiful window will open, Click on the Add button on Second window “This group is a member of:”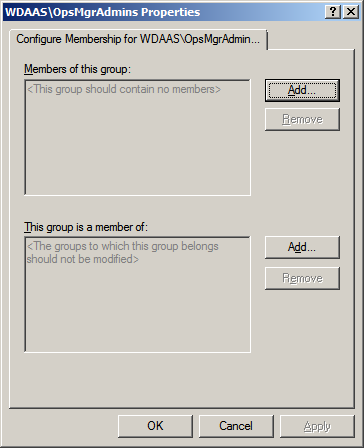
And add Administrators here.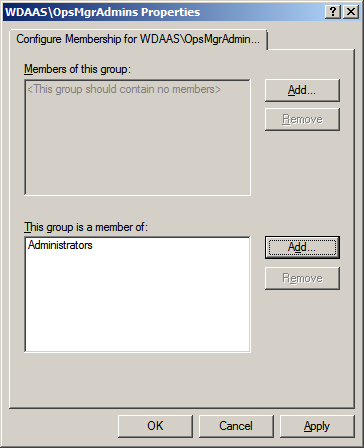
This is it, now all the members of “OpsMgrAdmins” group have Local Admin rights to the (=targeted) machies (Machines which are there inside “OpsMgrComputersOU” OU.)


